
LEARN HOW TO CREATE A WEBSITE IN UNDER 15 MINUTES

It seems like everyone has a website nowadays and you’re beginning to feel left out. After all, if someone can make a fan page that professes their love for Star Wars, you should be able to do the same, right? The only thing that is holding you back is the know-how.
Well, you’re at the right place. Here, you’ll find everything you need to help you get started on creating that online shrine to Darth Vader. We’ve created a step-by-step guide with pictures to help you through the process. If you follow our simple tutorial on how to create a website, you’ll have that website up in no time!
First thing’s first though: You want to choose a web hosting service that has a good reputation. There is nothing worse than choosing a host that experiences slow loading speeds or has more downtime than a benchwarmer at the Super Bowl.
With so many web hosts available, you may feel a little overwhelmed. Don’t worry, because we will also help you find the best hosting deals as we go through the tutorial.
Just in case you aren’t familiar with some of the terms, the domain name is the URL that people will type into the address bar at the top of the web browser (www.ExampleURL.com). You should also know that the domain URL serves as a guide to where your site is located (hosted). The web hosting service is actually where your site is stored. The host gives you so much space on its servers to accommodate the content that is on your site. In a way, think of the host as the skeleton and the content is everything that you add to the site to make it yours.
For all intents and purposes, we will be using the free software platform called WordPress. This software is perfect for new folk who are just learning how to create a website.
Once you’ve selected the web host that best suits your needs, you’ll have to choose a unique domain name that relates to the overall idea of your website. You don’t want to pay homage to Darth Vader but have your domain name FluffyKitties.com. Be sure to pick a name that is easy to remember and gives your intended viewer a better idea of what the site is about. So… Let’s begin here.
Step 1 — Choosing Your Domain Name
While there aren’t any specific rules when it comes to choosing a domain name, there are some things you will want to keep in mind. As I mentioned above, you want your domain name to reflect the overall concept of your website—whether it is going to be a personal site, a blog, or if you will be using it to promote your personal business.
Here are some tips to help you choose the perfect name:
1. Make a connection between the site name and the content
2. The more memorable the name, the better
3. Make sure your desired name is short and descriptive
4. Choose the right extension (most websites use .com/ .net/ .org)
You will want to keep in mind that there are millions of websites on the internet, so there are chances that you will not be the only person to come up with that perfect domain name. This is when you want to use a domain name availability tool. The domain name availability tool is pretty helpful because it can tell you immediately if your desired domain name is currently in use, or if it is free and ready for you to snag for your very own use.
Of course, if the name has been used already, you can usually tweak the name by adding a word or two.
When you’re completely satisfied with the domain name, we can move on to Step 2.
Step 2 – Set Up A Web Host Account
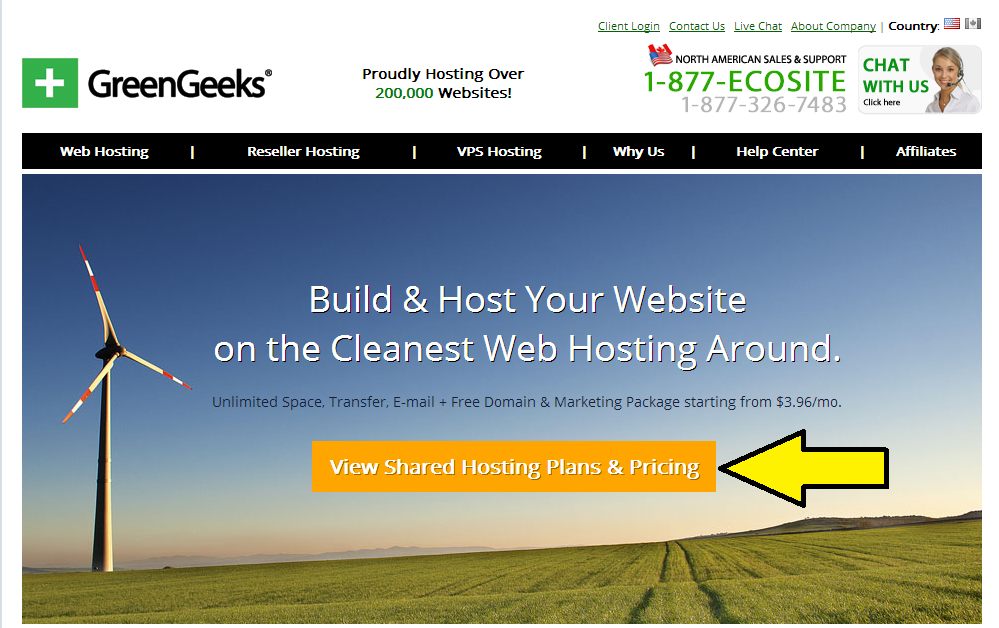
Once you’ve chosen your domain name, you will want to set up a web host account. I fully recommend using GreenGeeks.com to register your domain and host your website. GreenGeeks is an American company that offers incredible service and support—plus they have competitive prices.
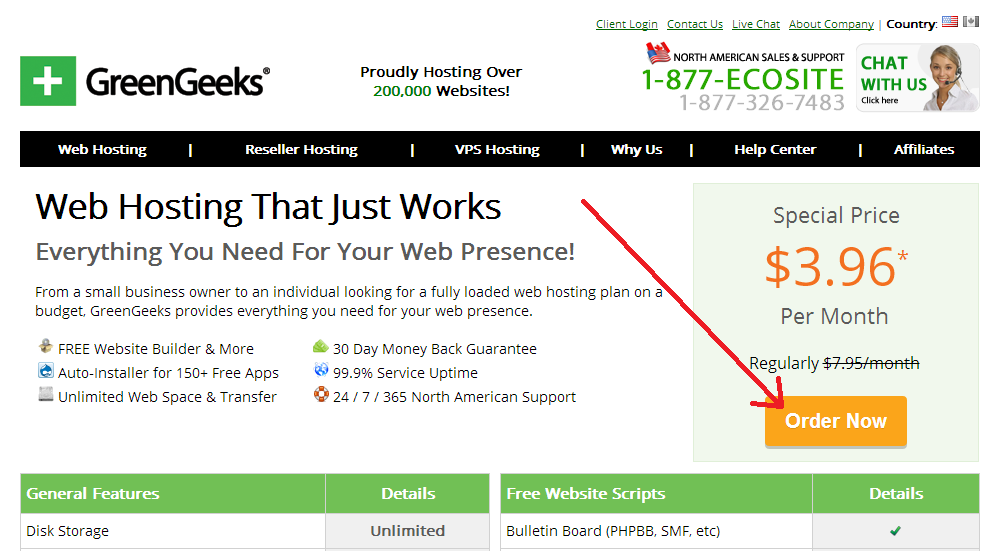
When you get to GreenGeeks.com, you will first see “View Shared Hosting Plans & Pricing”. After clicking on it, you will see the orange “Order Now” button. When you click on that button, it will take you to the secure order form.

If you look to the left, that box is where you will enter your domain name and choose the appropriate extension. Then you will want to hit the “Next” button (if you have a domain name, enter that name on the right side).
Side Note: If you’re desired name is already in use by someone else, you will get an error message. If that happens, you can try different variations of the name until you find one that you like and is available. This is where the domain name tool mentioned above comes in handy.
When you have a domain name that you like (and is available), you will see a sign up form like the one pictured below. All you have to do here is fill out your information and choose the plan that best suits your needs.
When you have finished filling out the order form and you’ve picked the best plan for you, go ahead and click on that “Create My Account” button at the bottom of the page.
Next you’ll have to wait for a confirmation email to be sent. This email usually comes through pretty quickly, but sometimes it can take a few hours to get to you. You may want to check your spam folder if it takes longer than a few hours, because you can’t do anything to your site because the email will contain your login information.
The company is pretty vigilant when it comes to security and they take your privacy and protection seriously.
Step 3 – Setting Up Your Website
Now is the time you get your hands dirty (figuratively speaking of course) and begin creating that amazing website of yours. Since we are using WordPress, you don’t have to worry about how proficient you are (or aren’t) in programming or graphic design. WordPress is a free CMS (content management system) platform that allows you to create beautiful websites that are clean and simple to navigate. The platform essentially does all the work for you! You just have to add your content and customize it to your liking.
Ah, but let’s not forget that you’ve registered your domain with GreenGeeks! GreenGeeks has a built in WordPress installer called Fantastico. With this tool, we can set up our website within minutes! This quick and easy tool is one of the main reasons why we suggested GreenGeeks.com as a web host.
Enough chatting and let’s get started!
You’ll want to go to the GreenGeeks account manager page, which is also found in the email the company sent you earlier.
You’ll just want to enter your login information that you received in your email and click log in. On the next screen, you will come to the Server Quick Login page.
Next, click on the blue “cPanel Login” button. When you’re logged in, you will see a number of features at your disposal. For right now, we are going to focus on that blue smiley face button labeled “Fantastico De Luxe”.
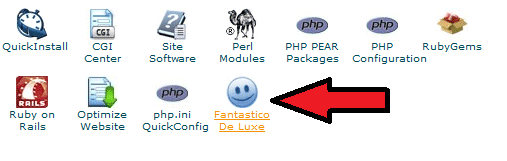
Click on that button.
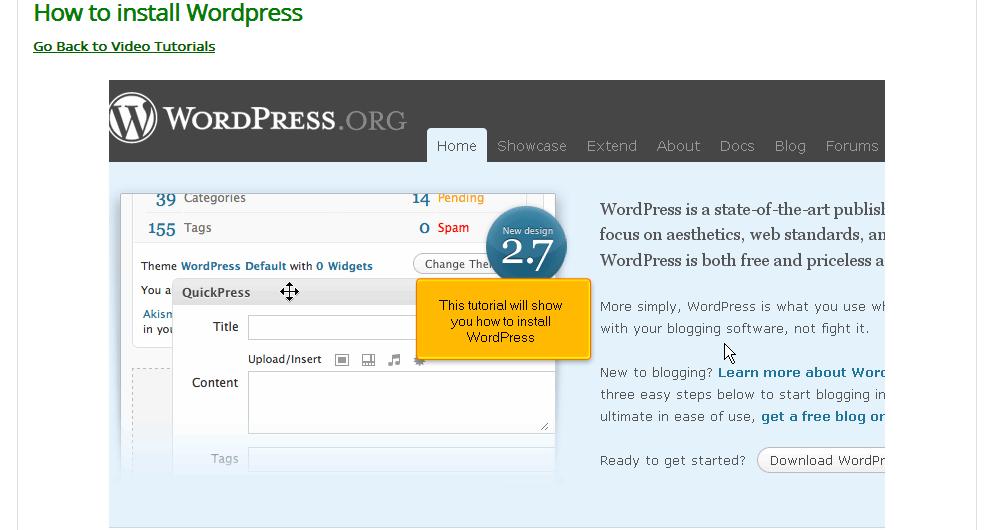
This will open up a new window and in the sidebar on the left, you will find a column called “Blogs”. Click on the link titled “WordPress”.
Now, there are only three steps to follow.
1 – Click on “New Installation”
2 – Choose your domain from the drop-down menu. Leave the “Install in Directory” field EMPTY (This is important!) and fill out the details (user name, password, site title, etc.)
3 – Click the “Install WordPress” button
Once you’ve followed those three simple steps, you’ll be given some information about your database (you don’t really have to worry about that for the time being). You will now see a prompt, just hit the “Finish Installation” button.
If you need some visual help, you can watch the video tutorial GreenGeeks.com provide.
That’s it! Pat yourself on the back because now, you have your very own website! Don’t believe me? Try your URL and you will see a default (twenty eleven) WordPress theme installed:
To configure your site, type in /wp-admin in the address bar after your URL and press enter. It should look like:
www.yourdomain.com/wp-admin
You’ll be asked to login. Here you just have to use the information that you chose while using Fantastico Deluxe (from the previous step).
This is the WordPress dashboard. This is the main control panel for your entire website. Everything that you want to do to your site, you will do it here. You can use this panel to add new content, images, videos, changing themes, plugins and so much more.
Let’s take a quick look at some of the features that you will probably get the most use out of.
1 – Posts and Pages
WordPress gives you the ability to create two unique types of webpages: the post and the page. Posts are generally used when you are hosting a blog instead of a regular website. What this means is that your visitors will be able to see a preview of your page before they decide they want to click on a link and read the entire post (this is how the majority of blogs work).
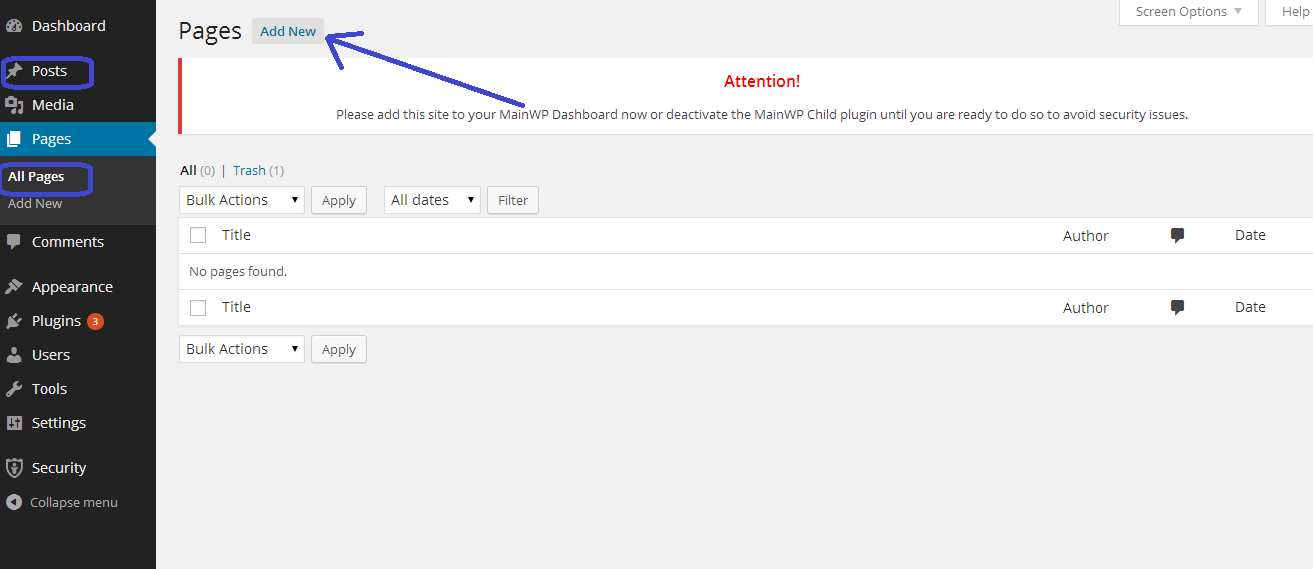
As a tip from me to you, if you are going to use the post option, you will want to put a high resolution, good quality picture at the beginning of your post. This picture is a great way to lure the readers to clicking the “Read More” link!
BUT you can also use regular pages and have links to them from your homepage (this is the page your visitors will see when they first come to your site). Either option is a suitable choice; however, if you plan on creating a blog, you will want to get comfortable with posts.
2 – Media
This tab is where all of your images and videos will be stored. You can upload your media here or directly while creating your website. It’s all about personal preference.
3 – Links
WordPress gives you the ability to create a multitude of categories of links. These categories can be filled with links of your own choosing. You’ll find this tool incredibly useful when you want to create widgets.
4 – Comments
One of the main reasons people want to create a website is to connect with other people! The comments section is where you can monitor that aspect of your site. You can enable them or turn them off, moderate, restrict, and more. Though, I fully recommend to leave comments on and unrestricted.
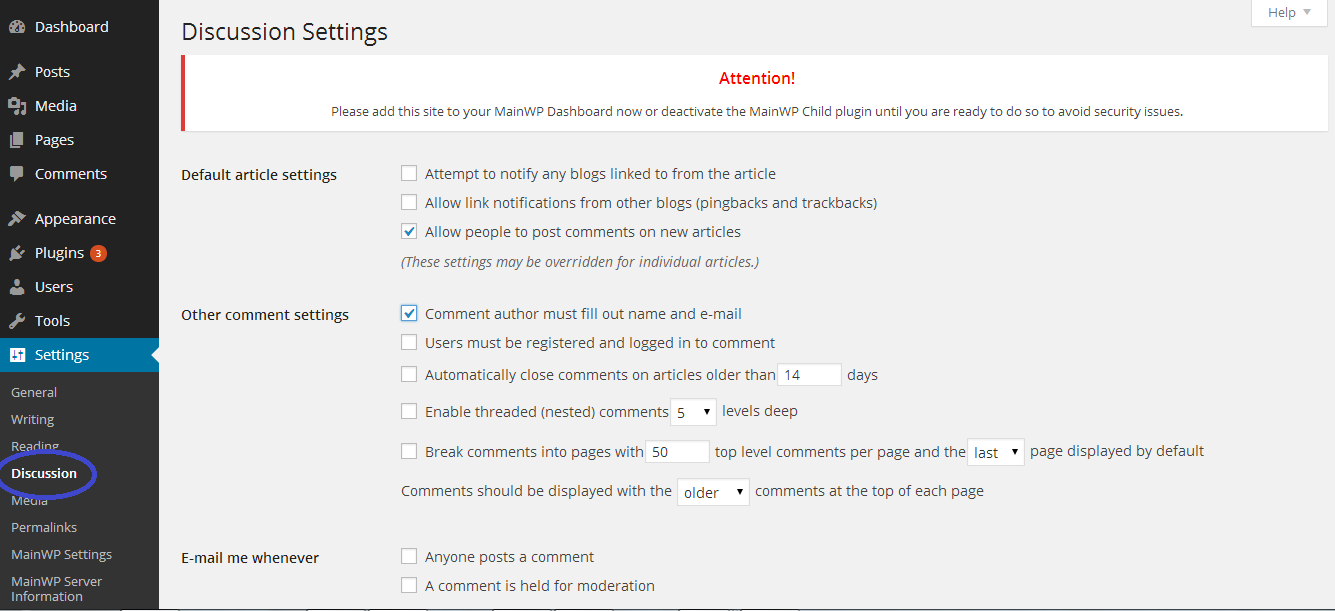
Unrestricted commenting is how you build a community and encourage conversation between your viewers.
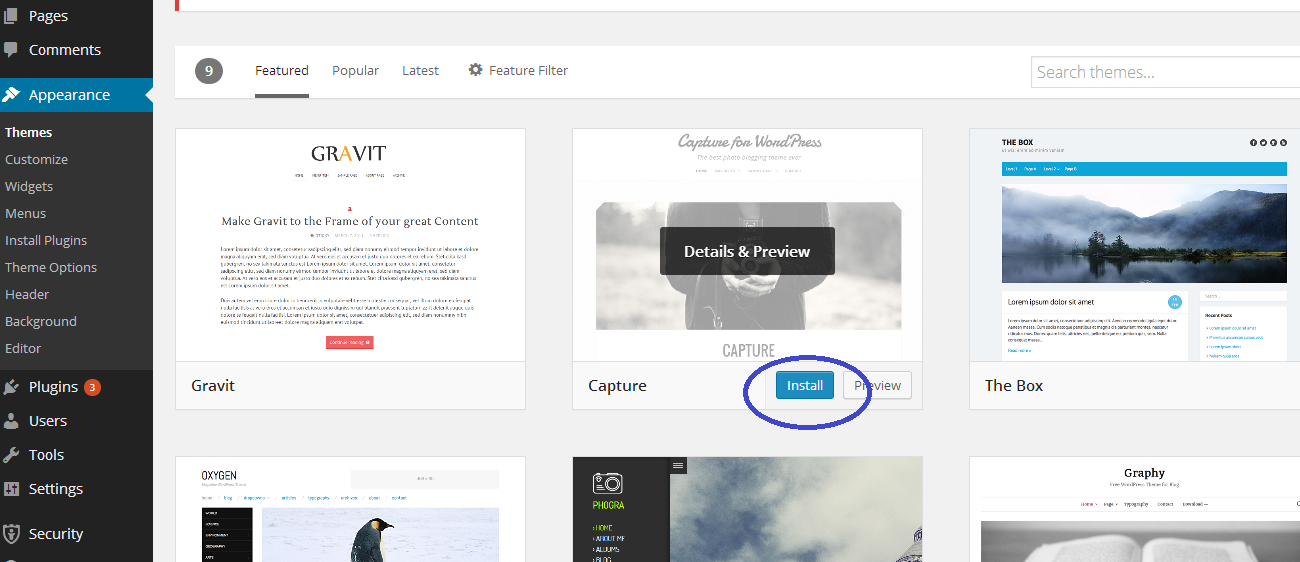
5 – Appearance
This feature is one of the most important aspects of WordPress. Here you can change the way your website looks with just a few clicks.
6 – Plugins
This is another great feature of using WordPress. Whether you want to add a visitor counter, an image slide show, or anything else to your website, you can bet that you will be able to find a free plugin for it. All you have to do is do a quick search and voila!
See? I told you that it was easy to learn how to create a website!
Thanks for visiting our site!